


How do I map my MIDI controller
If your MIDI controller is not natively supported (Plug and play) by VirtualDJ, you will need to map it yourself.
Mapping a MIDI Controller in VirtualDJ
First, check the Add-Ons page to see whether another user has already made a mapper for the same controller. This may save you a lot of time and effort.
If no mapper is available, you can easily create a basic* mapping for the controller:
For further information, please see VDJscript_verbs, VDJScript Examples and VDJscript.
*NOTE: LED's and other advanced MIDI features will not work unless a proper definition file for the controller is created.
FAQ Knowledge Database
First, check the Add-Ons page to see whether another user has already made a mapper for the same controller. This may save you a lot of time and effort.
If no mapper is available, you can easily create a basic* mapping for the controller:
- Go to SETTINGS -> CONTROLLERS tab
- Choose the device from the top-left side. VirtualDJ 8 usually displays the name of your device followed by the name of the mapping in parenthesis. Make sure the device is not set to Ignore

- Press a button or move a knob/slider on your controller that you wish to map. Each time you press a button or move a knob/slider, VirtualDJ will display a name for that key at the top of the Key Learn area. Click on the Key name to select the one you wish to map.

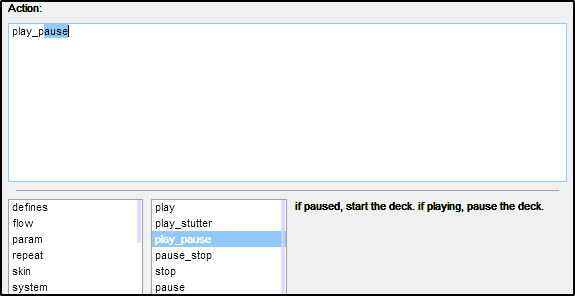
- Type an appropriate action in the Action: box, e.g: play_pause. VirtualDJ will auto-fill with one of the available actions as you type.
- Repeat the last 2 steps for all the Keys that you wish to map for your controller.
- Once the mapping is completed (you can still add and edit later of course), you can provide a name (optional) and save.

- Multiple mapping files can be created for the same unit, and applied from the Mappings field.

For further information, please see VDJscript_verbs, VDJScript Examples and VDJscript.
*NOTE: LED's and other advanced MIDI features will not work unless a proper definition file for the controller is created.