


User Manual
Sample Editor
The Sample Editor provides the tools required to create and/or alter a sample’s properties and behavior. It can be used with both Audio & Video files and when created will be saved as a .vdjsample file in it’s corresponding sample bank (folder).
The sample will only be audible through the PFL if a headphone channel has been created in the Audio Setup (if no headphone channel is available a pop up window will display asking if the feature can be used through the Master output).
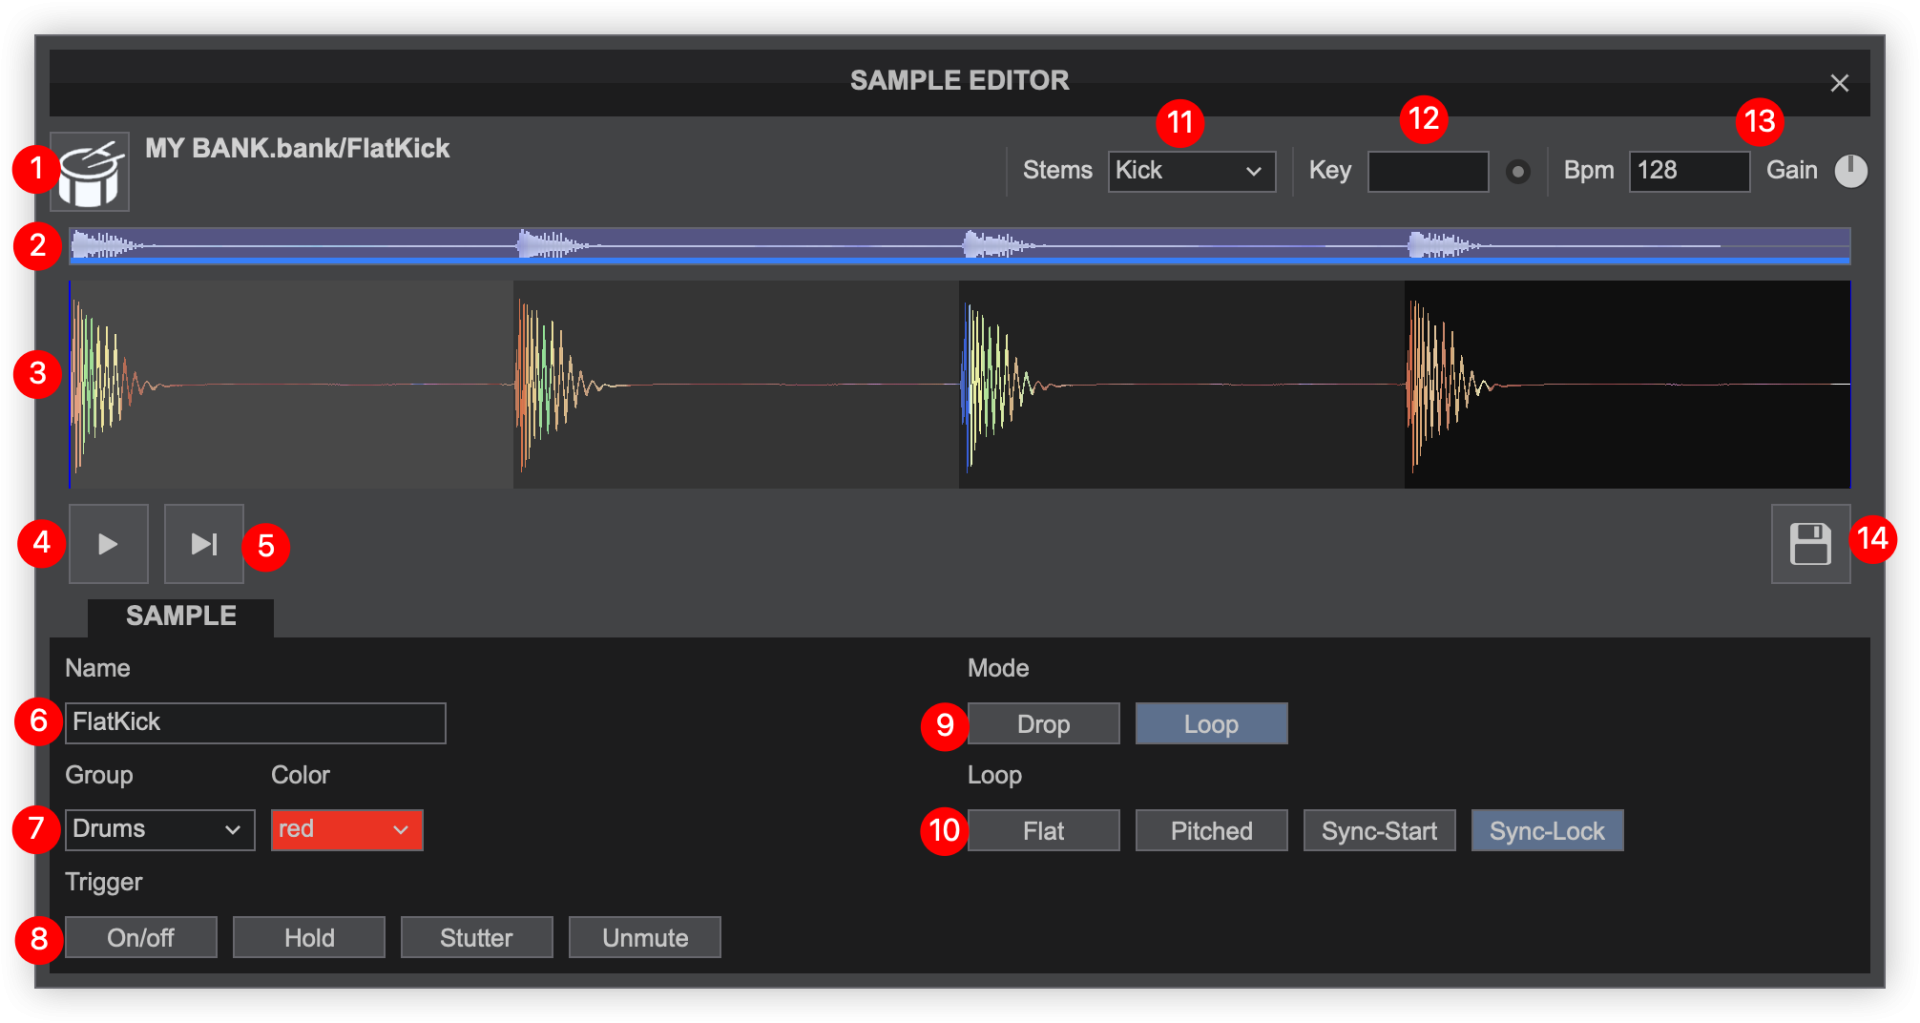
- SAMPLE NAME & ICON. Displays the name of the sample (non-editable) and the Icon associated with the file. Clicking on the image will provide the ability to remove or replace the icon.
- SCROLL BAR. Displays the zoom level of the waveform and can be dragged to any part of the file to perform precise adjustments.
- WAVEFORM. Provides a visual display of the audio information and position of the sample as indicated by the playhead. It displays the beatgrid using the grayscaled background and can be zoomed in to make precise edits with a wheel mouse. A beat anchor (indicated in red) will display to the left of the waveform indicating the first detected beat of the sample.
- PLAY/STOP. Will play the sample if it is stopped and will stop the sample if it’s playing.
- PLAY-HOLD. Plays the sample as long as the button is held. Once released, the playhead will jump back to it’s previously stopped position.
- SAMPLE NAME. Edits the sample’s name by overwriting this field.
- GROUP & COLOR. Type a name to create a new Sample Group or add the sample to an existing one using the Drop down selection list. Click on the Color field to select the color that the Sample will have in the Pad View. If a sample is part of Group, the color selection will apply automatically to all the samples in that Group.
- TRIGGER. Select one of the four available Trigger modes. If the Sample is part of a Group, the selection will apply to all the samples of that Group.
ON/OFF Press a Sampler Pad to start playing a sample from the beginning. Press the same Sample pad again to stop the sample. HOLD The Sample will play from the beginning as long as the Sampler Pad is pressed. STUTTER The Sample will play from the beginning, each time you trigger a Sampler Pad. Right-click to stop the Sample UNMUTE The Sample will be muted if the Sampler Pad is not pressed. Right-click to stop the Sample. - MODE. Choose if the Sample will be a Drop (the sample will play once when triggered) or a Loop (the sample will play in a Loop until stopped).
- MODE SETTING. Depending on the mode selected, this selection of buttons provides the ability to alter how the sample behaves when played.
DROP MODE FLAT The sample will play without any pitch/tempo changes. PITCHED The sample will play at the same tempo as the Master Output. Loop MODE FLAT The sample will keep playing without any pitch/tempo changes. PITCHED The sample will play at the same tempo as the Master Output. SYNC START The sample will play at the same tempo as the Master Output and will be synced with the CBG (phase) of it. SYNC LOCK The sample will play at the same tempo as the Master Output and will be synced with the CBG (phase) of it. The sample will start at the same CBG number (if the track on the Master Output is at beat 3 of a 4-beat phase, the sample will start from the tracks 3rd beat). - Stems . Provides the ability to assign which Stems are audible on the edited sample. Select between Full Track, Vocal, Instrument, Bass, HiHat, and Kick. Multiple Stems can be assigned to the edited sample unless Full Track is selected.
- KEY. Provides different key compatibility options for when the sample is triggered in the Sampler:
Don't match key The sample will keep it's original key and not match the key of the Master output. Match compatible key The sample will play in a compatible key of the Master output. Match exact key The sample will play in the exact key of the Master output. Analyze Key The sample's key will be analyzed and displayed in the key field (if available). - BPM & GAIN. The BPM of the sample can be edited by clicking on the BPM field and entering a different value. The beatgrid (grey scaled background) will be adjusted in real time to make precise adjustments in order to keep the sample in sync with the Master deck. The gain is automatically set to the 12 O’clock position and 0db (unless otherwise specified in settings) and can be adjusted by clicking on the dial with the mouse.
- SAVE. Click on this button to save the edits performed.
EDITING AN EXISTING FILE
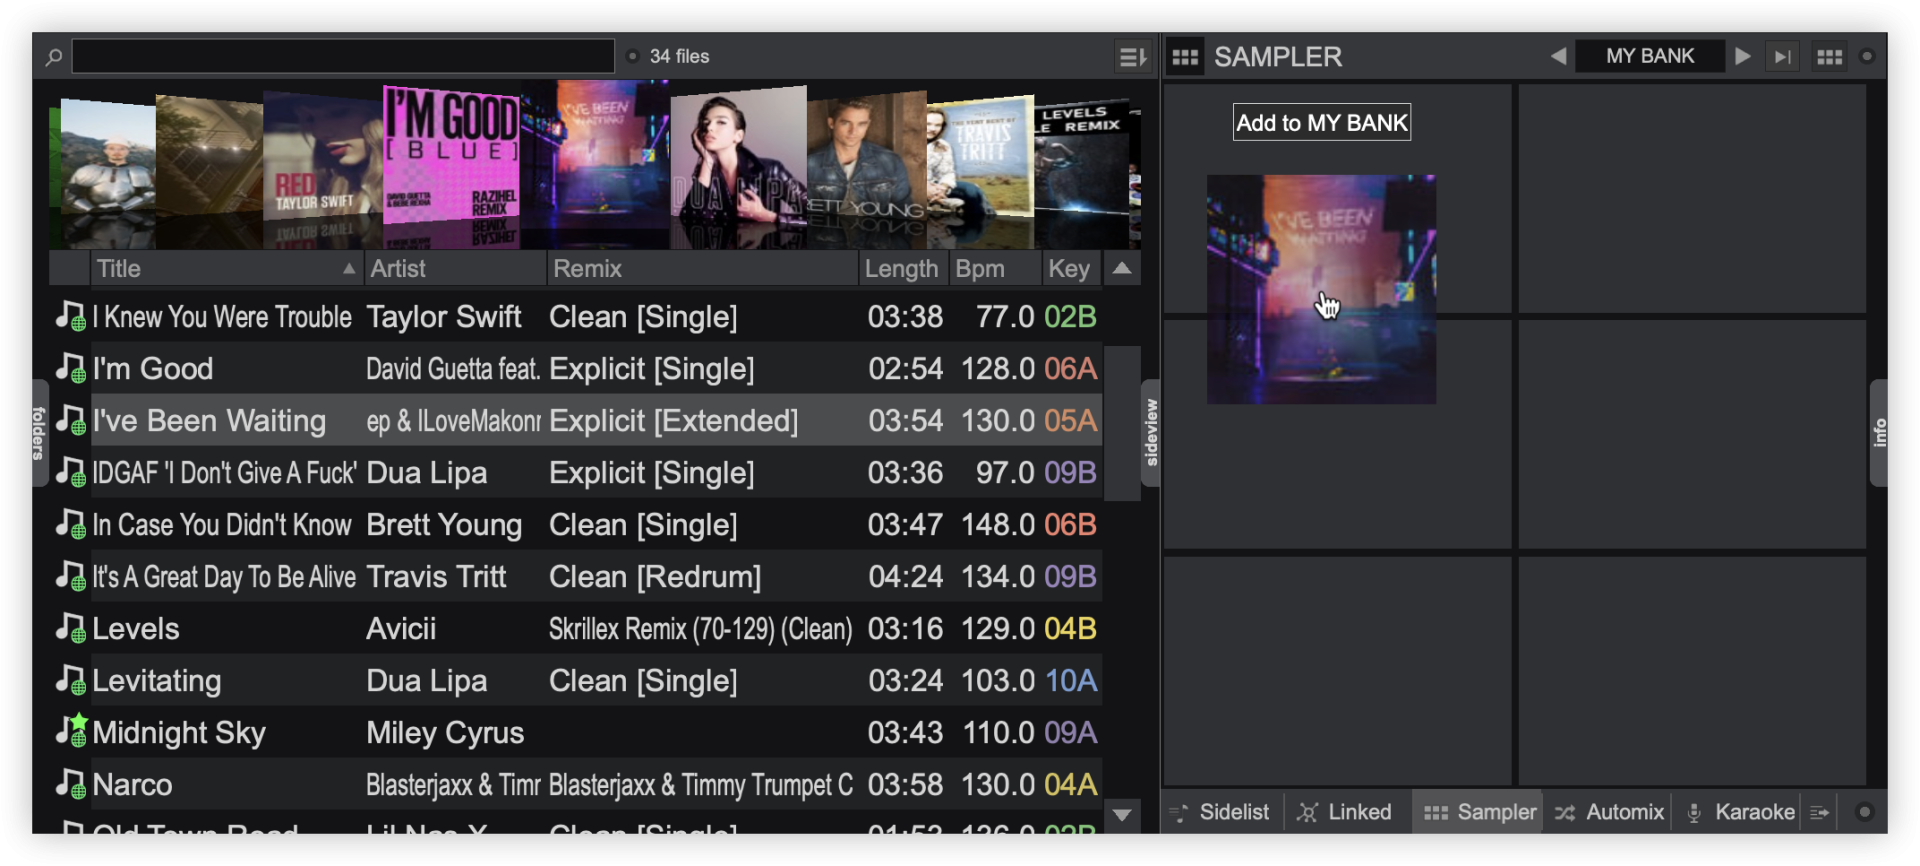
- Drag and drop a file into any Sampler Bank Folder (Folder View) or Sample Pad (Side View). In the File List, right-click or use CTRL+click on the Sample Pad to open the Sample Editor . The entire track will then be displayed.
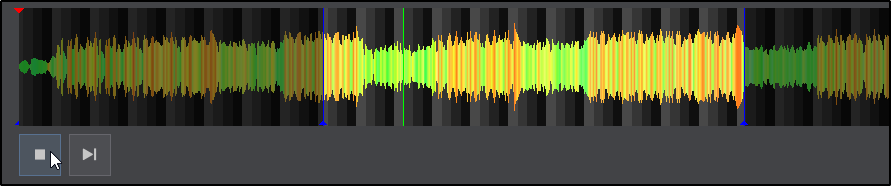
- Two blue lines will appear, one at the beginning and one at the end of the file indicating the length of the sample. Use a mouse wheel to zoom in/out of the waveform, to focus on the part that is to be edited. Move the blue vertical lines to define the part of the file that is to be kept as the Sample.

- Preview the sample by pressing the play/stop button or holding the play-hold button. The playhead (green vertical line) can be dragged to any position of the file. Continue to zoom in and out of the file to make precise edits.
- Once the section of the file has been defined and the editing process is complete, choose a name for the sample. Group, Color, Trigger or Mode can also be added at this stage but not necessary as these options can be altered at a later time. Click on the Save button to finish the process.

VIDEO SAMPLES
If a video sample or track is opened with the Sample Editor , an additional Video preview window will be displayed at the end of the waveform. Hovering the mouse to any position of the waveform will display that frame in the preview window. Define the area of the video to be sampled with the blue start and end indicators (see Using An Existing File).

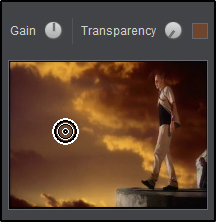
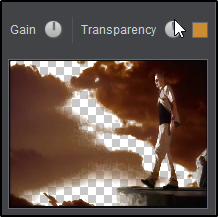
Transparency for the Video Output can be defined by clicking the color selector in the Transparency section then hovering over the area in the video with the eyedropper to highlight the exact color. Once the color is selected with the eyedropper tool, the strength of the transparency can be adjusted by using the dial to increase or decrease the intensity. In the majority of cases, setting the transparency dial to the 12 O’Clock position will deliver the best balance.
Once Editing is complete, the Sample can be saved as Audio Only, Video Only or Both (pictured below) by clicking on and highlighting the Audio and Video Buttons.
